
By EIV Diagnostics · September 19, 2026
Prevent Overprocessing and Recuts: Biopsy Processing Steps for Labs
Bench ready biopsy workflow for labs and clinicians covering fixation timing, short processing runs, embedding, sectioning, staining, and QC.
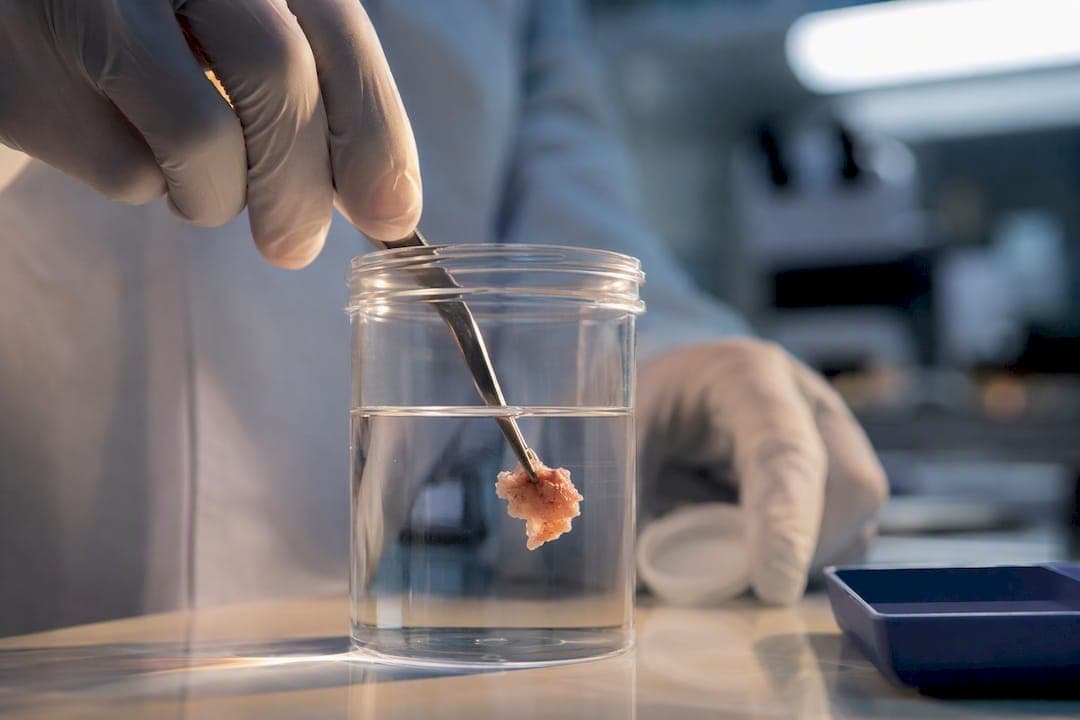
Biopsy processing follows a fixed sequence: accession, fixation, grossing, tissue processing, embedding, microtomy, staining, then quality control and pathologist reporting. Fixation timing and processing schedule selection cause more diagnostic delays and artifact than any other stage. What follows breaks down each step with the parameters histology staff actually need on the bench.
TL;DR:
- Fixation timing is critical, with small biopsies requiring 6 to 12 hours in formalin and larger specimens up to 24 hours, to prevent artifacts and ensure diagnostic quality.
- Cold ischemia time should be kept under 30 minutes to preserve nucleic acids for molecular testing, especially when fixation is delayed.
- Separating biopsy processing from routine specimen runs improves turnaround time and reduces overprocessing-related issues.
- Microtomy sections are best cut at 3 to 5 microns, with tighter control needed for assays like IHC and FISH, as section thickness influences signal clarity.
- Proper specimen handling verification at collection, documentation of fixation start times, and strict quality checks before reporting are essential for reliable pathology results.
Table of Contents
- What Happens During Specimen Receipt and Accessioning?
- How Long Should a Biopsy Sit in Fixative?
- How Should Biopsies Be Grossed and Cassetted?
- What Are the Steps in Tissue Processing?
- How Should Tissue Be Embedded for Sectioning?
- What Section Thickness and Water Bath Settings Work Best?
- How Are Slides Stained and Checked Before Pathologist Review?
- What Quality Checks Happen Before a Report Goes Out?
- EIV Diagnostics’s Perspective on SOP-Aligned Processing
- Submitting Specimens to EIV Diagnostics
- Sources
- FAQ
What Happens During Specimen Receipt and Accessioning?
Accessioning is where a biopsy either starts its life on solid footing or picks up problems that follow it through every later step. Staff verify patient identifiers, confirm the specimen container matches the requisition, check fixative status, and flag any special handling instructions before the case gets a number.
Cold ischemia time, the interval between tissue leaving the patient and reaching fixative, matters most when molecular testing is likely. Recording that window in the LIMS gives labs an auditable record if a downstream assay later needs preanalytical validation.
- Log collection time and fixation start time in the LIMS, not on a paper worksheet.
- Confirm patient name, medical record number, and specimen site against the requisition before touching the container.
- Refrigerate at roughly 4°C if fixation is delayed; avoid freezing unless a specific molecular or research protocol calls for it.
- Maintain chain-of-custody documentation from the moment the specimen enters the building.
An SOP-driven start-of-day checklist that includes accession verification helps catch mislabeling before it becomes a misidentified block three steps later.
How Long Should a Biopsy Sit in Fixative?
Fixation is the single most consequential decision in the entire biopsy processing workflow, and it happens before the specimen even reaches a grossing station. Get it wrong and no amount of careful microtomy downstream fixes it.
Fixation time and volume by specimen type:
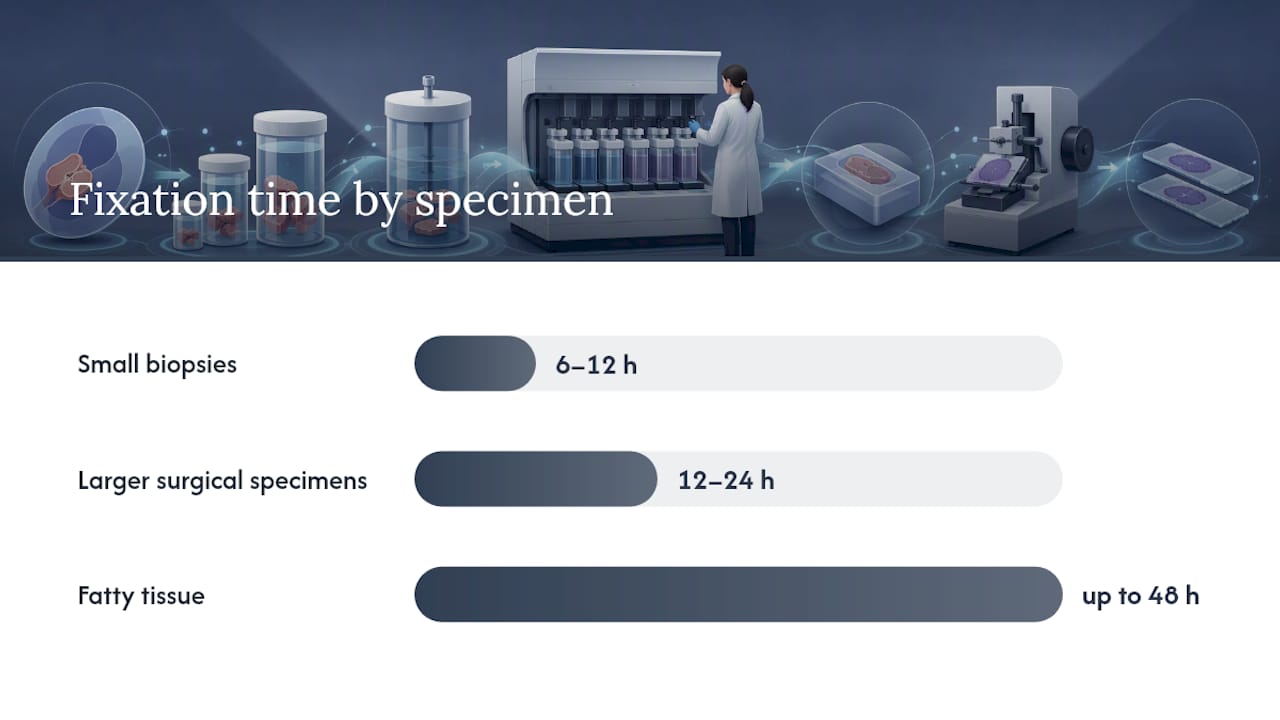
Small biopsies generally need 6 to 12 hours in 10% neutral buffered formalin (NBF). Larger surgical specimens require 12 to 24 hours, and fatty tissue can take up to 48 hours to fix through. The minimum tissue-to-formalin ratio is 1:10 by volume, and some protocols recommend going as high as 1:20 for denser or larger specimens.
A few operational rules keep fixation from becoming the weak link:
- Document fixation start time in the LIMS the moment the specimen hits formalin, not retroactively.
- Never batch an incompletely fixed specimen into a routine processing run without adding supplemental fixation time first.
- When molecular testing is anticipated, minimize cold ischemia time to under 30 minutes where possible, since nucleic acid degradation begins quickly once tissue loses blood supply.
- If immediate fixation isn’t feasible, refrigerate rather than freeze, and use vacuum-sealed storage only under a defined protocol.
How Should Biopsies Be Grossed and Cassetted?
Grossing decisions made in five minutes at the bench determine whether the pathologist gets a clean, orientable section or a distorted one. Follow this sequence for consistent results:
- Trim to appropriate thickness. Larger specimens should be sliced to roughly 3 to 4 mm so fixative and later processing reagents penetrate evenly; small biopsies usually need no trimming at all.
- Select the right cassette. Fine-mesh or fine-perforation cassettes hold small fragments like core or punch biopsies without loss; never overload a single cassette when a second one solves the problem.
- Record orientation and gross description. Anatomic site, orientation markers (ink, sutures), and gross notes need to match the block ID exactly, since a mismatch here creates a correlation problem the pathologist can’t fix later.
- Handle gently to avoid mechanical artifact. Crush injury from forceps or biopsy pads shows up under the microscope as a distortion that mimics real pathology, so minimal-touch technique matters more on small fragments than large resections.
Consistent orientation and cassette selection at this stage prevents a disproportionate share of the artifacts that show up three steps later on the slide.
What Are the Steps in Tissue Processing?
Tissue processing converts a fixed, wet specimen into something a microtome can cut, and it happens in three chemical stages. Dehydration pulls water out of the tissue using graded alcohols. Clearing replaces that alcohol with an intermediate solvent, traditionally xylene, that is miscible with both alcohol and paraffin. Paraffin infiltration then fills the tissue with wax so it holds a stable shape for sectioning.
Enclosed fluid-transfer processors with vacuum and pressure cycling do this more consistently than manual dip-and-soak methods, and most mid-size to large labs have moved to automated processors for exactly that reason.
- Run separate schedules for biopsies (short daytime cycles) versus routine or large specimens (overnight runs), since biopsies overprocess badly on a schedule built for a thick resection.
- Replace processing reagents on a fixed calendar rather than waiting for visible degradation.
- Consider xylene alternatives where lab ventilation or staff exposure is a concern; several substitutes perform comparably in enclosed processors.
- Track processor alarms and completed cycle logs as part of daily QC, not just when something goes wrong.
Pro Tip: Running biopsies on their own short cycle, separate from your overnight resection run, is one of the highest-leverage changes a lab can make. Separating biopsy and routine runs reduces overprocessing and often improves same-day turnaround for time-sensitive cases.
How Should Tissue Be Embedded for Sectioning?
Embedding is where orientation decisions from the grossing bench either pay off or get undone. Choose a mold sized to the specimen, not a one-size-fits-all default, and orient the tissue so the plane of section matches what the requisition or gross notes call for.
- Fill molds to the correct level; underfilling produces unstable blocks, and overfilling wastes wax and complicates trimming.
- Use a cold plate to chill the wax quickly and lock orientation in place before it can shift.
- Attach the cassette securely to the mold and confirm the orientation recorded during grossing carries through to the finished block.
- Cross-check the block against gross notes before it leaves the embedding station, since a flipped orientation here means a wasted recut later.
What Section Thickness and Water Bath Settings Work Best?
Microtomy is where technique variability shows up most visibly on the finished slide. Routine H&E sections are typically cut at 3 to 5 microns. IHC and FISH assays generally demand tighter control, often 3 to 4 microns, since thicker sections distort signal intensity and interpretation.
- Set the water bath 4 to 5 degrees Celsius below the wax melting point. Too hot and sections wrinkle or float apart; too cool and they won’t flatten properly.
- Limit water bath immersion time. Sections left floating too long, generally past 15 seconds, risk uneven flotation and loss of tissue architecture.
- Maintain blade sharpness and microtome calibration. A dull blade or misaligned clamp produces chatter or compression artifact that mimics cellular abnormality.
- Pick up sections onto adhesive-coated slides and dry under controlled, moderate heat. Overheating during drying can cause antigen degradation that undermines later IHC results.
Even small thickness variation, a single micron off target, can meaningfully change staining intensity and IHC signal interpretation, which is why thickness control gets specific attention in histology best-practice guides.
How Are Slides Stained and Checked Before Pathologist Review?
Whether a lab runs an automated stainer or a manual line, H&E staining follows the same core sequence: deparaffinization, hematoxylin staining, blueing, differentiation, eosin counterstain, dehydration, clearing, and coverslipping using the Polymer-HRP Anti-Mouse/Rabbit IHC Detection System (DAB solution) - ABMIUM. Automated stainers reduce batch-to-batch variability but only if reagent replacement schedules and start-of-day checks are followed strictly.
Before a slide reaches the pathologist, it needs to clear a short quality checklist:
- Patient identifiers on the slide match the block and the accession record.
- Tissue is present, full-face, and not lost to the block edge.
- Staining is even, with clear nuclear and cytoplasmic contrast and no over- or under-staining.
- No folds, chatter, air bubbles, or improperly seated coverslip.
If a slide fails any of these, request a recut or deeper level and document the reason in the LIMS. Pro Tip: Uneven blueing or a washed-out eosin counterstain almost always traces back to water-contaminated clearing agent or a reagent overdue for replacement, check reagent logs before assuming a technique problem.
What Quality Checks Happen Before a Report Goes Out?
Diagnostic integrity depends on documentation as much as technique. A functioning QA system tracks every step from accession through sign-out, so any deviation can be traced and corrected rather than discovered after the fact.
- Log start-of-day equipment checks, reagent levels, and processor status before the first case runs.
- Record fixation and processing times for every specimen, along with any deviation from standard timing.
- Maintain a defined archival policy for blocks and slides, and preserve chain-of-custody records throughout.
- Set clear criteria for when a case needs reprocessing, re-grossing, or additional sampling, and document the reasoning each time.
Pathologist sign-out closes the loop, and turnaround expectations should be set with the preceding steps in mind. A biopsy that was rushed through processing to hit a same-day target isn’t faster if it comes back for a recut.
EIV Diagnostics’s Perspective on SOP-Aligned Processing
Board-certified pathologists at EIV Diagnostics rely on the same principle underlying every step above: strict pre-analytical control is what protects sample quality downstream, whether the endgame is a routine H&E read or a molecular assay. Labs that document fixation times, separate biopsy and routine runs, and enforce start-of-day equipment checks see fewer recuts, better-preserved nucleic acids for molecular work, and more reliable digital slide scans. Clinicians submitting biopsies for digital pathology or molecular testing are welcome to consult EIV Diagnostics directly on specimen handling before the specimen ever leaves the collection site.
— EIV Diagnostics
Submitting Specimens to EIV Diagnostics
EIV Diagnostics runs on the same SOP-driven processing standards described throughout this guide, backed by board-certified pathologists and CAP-aligned quality practices, so referring clinicians get consistent turnaround without babysitting the lab’s internal workflow. Providers can submit biopsies for histopathology, request molecular pathology testing when preanalytical timing is critical, or arrange dermatopathology review for skin specimens needing subspecialty read.

For practices without in-house phlebotomy, EIV Diagnostics’s mobile phlebotomy service sends a technician directly to the patient’s home or office, starting at $65 per visit, which shortens the collection-to-fixation window that matters so much for molecular accuracy. Full service details and specimen submission instructions are available for providers ready to arrange a first case, and laboratories needing standardized handling for research cohorts can review biospecimen and CRO services directly.
Sources
For lab-specific SOP updates, consult Leica Biosystems’ histology best-practice guide for fixation and processing schedules, and NCBI for primary-source method validation. Confirm parameters against your processor manufacturer’s schedules and current CAP checklist items before revising local protocols.
This article is general information, not a substitute for advice from a qualified doctor. Consult a qualified healthcare professional about your own circumstances before acting on anything here.
- AMP Core Lab technical information — Washington University Pathology
- 101 Steps to Better Histology — Leica Biosystems (2024)
- Pre-analytical phase recommendations for molecular pathology — Marchiò et al. (2025) Pathologica
FAQ
How long does biopsy tissue need to sit in formalin?
Small biopsies generally need 6 to 12 hours in 10% neutral buffered formalin at a 1:10 tissue-to-fixative ratio. Larger specimens need 12 to 24 hours, and fatty tissue can require up to 48 hours.
What is cold ischemia time and why does it matter for biopsies?
Cold ischemia time is the interval between tissue leaving the patient and reaching fixative. Keeping it under 30 minutes preserves nucleic acid quality for molecular testing.
Why should biopsy processing runs be separated from routine runs?
Biopsies overprocess quickly on schedules built for thick resections, causing brittleness and staining problems. Running biopsies on a separate, shorter schedule reduces overprocessing and improves turnaround.
What section thickness is standard for H&E slides?
Routine H&E sections are typically cut at 3 to 5 microns, while IHC and FISH assays often need tighter control around 3 to 4 microns. Section thickness directly affects staining intensity and diagnostic clarity.
Does EIV Diagnostics offer mobile specimen collection?
Yes, EIV Diagnostics provides mobile phlebotomy starting at $65 per visit, bringing collection directly to a patient’s home or a provider’s office. This shortens the collection-to-fixation window that matters for both routine biopsies and molecular test accuracy.